
Showing posts with label Desserts. Show all posts

August 30, 2010

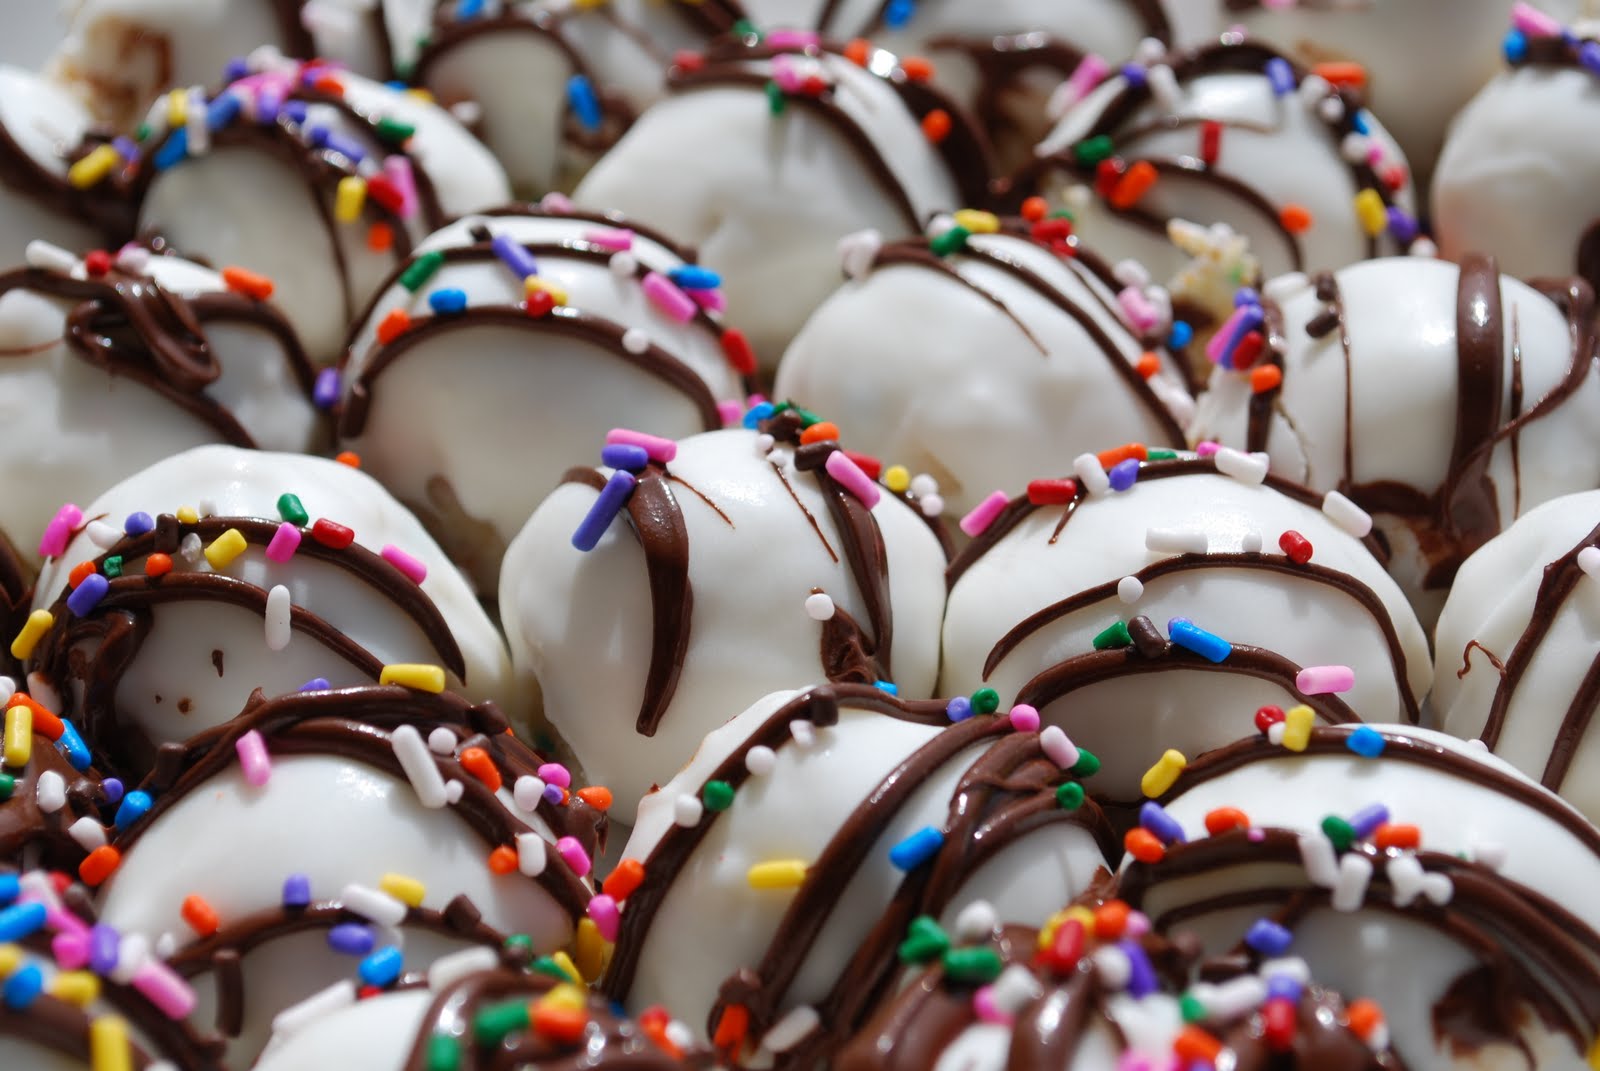
Cake Bites


These little cake bites seem like they are all the rage right now. I made these to go along with my son's birthday cake. They are very rich; but delicious and very versatile. You can pick any cake mix flavor and any frosting you want. Mix and Match. Be Creative. Here's how I did it:

First bake the cake mix (I used the party chip flavor) in a 9 x 13 pan according to box directions. Wait until it is COMPLETELY COOLED, (I waited several hours even), and then just spoon out the cake mix into a big mixing bowl.

Spool a whole jar of frosting into the bowl and mix together. I used a small cookie scoop thing to scoop out the cake into balls, and then put on a cookie sheet to chill in the fridge. Let chill for awhile.

I used white melting chocolate to do this part, but you could use whatever you like. I melted it and then rolled the chilled cake ball into it and put some sprinkles on top. Then I also melted some milk chocolate, put it in a bag, snipped the end and made the zig zag design over the cake balls/bites.

Let the cake bites chill again until the chocolate has set. Then enjoy! My kids loved helping me make these.

July 06, 2010

Smore's Stuffed Brownies


This recipe is from Picky Palate, which is an amazing recipe blog! I made these twice in a week, they are very good. I would recommend making them with plenty of time to have the chocolate set up. I made them in the morning for the after dinner dessert, and they turned out perfect! Here is the recipe:

Batch Prepared in 8×8 inch baking pan

1 box of your favorite brownie mix

4 1/2 full Graham Crackers

3 1/2 Full size Hershey’s Bars

16 large marshmallows

1. Preheat oven to 350 degrees F. Prepare brownie mix according to package directions. Line foil into an 8×8 inch baking pan and spray generously with cooking spray. Pour half the brownie batter into lined pan. Layer graham crackers over brownies following Hershey Bars and marshmallows. Pour remaining brownie batter over marshmallows. Bake for 40-45 minutes or until toothpick comes mostly clean from center. Remove from oven and let cool completely. Carefully remove foil and brownies from pan. Peel any foil from away from edges and cut into squares.

12 brownies

Click HERE to see the recipe with additional pictures on Picky Palate.

*picture from Picky Palate

June 30, 2010

Easy Patriotic Flag Dessert

I made this last year and everyone loved it. I'm looking for something new this year, but this is pretty good that I might just make it again and call it a tradition.


3 cups boiling water, divided

2 pkg. (4-serving size each) JELL-O Berry Blue Flavor Gelatin

2 cups ice cubes, divided

2 pkg. (8 oz. each) Cream Cheese, softened

1/4 cup sugar

1 tub (8 oz.) COOL WHIP Whipped Topping, thawed, divided

2 pkg. (4-serving size each) JELL-O Strawberry Flavor Gelatin, or any red flavor

2 cups halved strawberries

1/2 cup blueberries


STIR 1-1/2 cups of the boiling water into dry blue gelatin in medium bowl at least 2 min. until completely dissolved. Add 1 cup of the ice cubes; stir until ice is completely melted. Pour into 13x9-inch dish. Refrigerate 20 min. or until gelatin is set but not firm.

PLACE cream cheese, sugar and half of the whipped topping in large bowl; beat until well blended. Spoon over blue gelatin layer in dish; spread carefully to evenly cover gelatin layer. Stir remaining 1-1/2 cups boiling water into strawberry gelatin in separate bowl at least 2 min. until completely dissolved. Add remaining 1 cup ice cubes; stir until ice is completely melted. Let stand at room temperature 5 min. or until slightly thickened. Spoon over cream cheese layer in dish. Refrigerate 3 hours or until set.

SPREAD remaining whipped topping over dessert just before serving. Decorate with strawberries and blueberries to resemble a flag. Store leftover dessert in refrigerator


To see TONS of 4th of July recipes, crafts, and decorations, check out the link party at craftaholics anonymous:

June 16, 2010

Homemade Ice Cream in a Bag


With summer FINALLY here, this is such an awesome way to have some great homemade ice cream, and a really fun activity for the kids. It's also an awesome way to get lots of different flavors. When I did this, I had my kids and my friend's kids (two four 4 olds and two 2 year olds all together) do this and they did it just great. It says to shake the bag for 5 minutes, and they didn't do it quite that long but it still turned out. I would recommend duck taping the top of the bag that has the ice cream ingredients in it, then sticking it inside the bag with the ice and salt, then sticking that bag inside a grocery sack and tying the top. It's easier for the kids to shake it (doesn't get their hands as cold) and doesn't make quite the mess.

Ingredients:
2 Tab. Sugar
1 cup Half and Half
1/2 teaspoon vanilla extract
1/2 cup salt (the bigger the granules, the better. Kosher and rock salt work best)
Ice Cubes (enough the fill each gallon size bag about 1/2 full
1 pint size ziplock bag
1 gallon size ziplock bag

Directions:
Combine the sugar, half and half, and vanilla extract in the pint size ziplock bag and seal tightly (I duct taped mine close). Place the salt and ice inside the gallon size bag, and then place the pint size ice cream bag inside the gallon ice bag and seal tightly. ( I put mine inside a grocery sack as well). Shake the bags until the mixture hardens (about 5 minutes). Take the smaller bag out and add mix-ins if you want. You can put in cups or eat straight out of the bag.

Just FYI:
I made 5 bags of the ice cream and it took this much ice and half and half:
one 7 lb. bag of ice
one 1/2 gallon of half and half

Recipe found at Family Fun, click HERE to see

linked to these parties

May 05, 2010

Ladybug Cookies


I made these cookies for a friend's daughter's birthday party. She turned one and was having a ladybug birthday party. I got 2 packages of oreo cookies, some red melting chocolate from Michael's (they are called Wilton Candy Melts and come in a variety of colors for $2.99 a bag, one bag was plenty for this) , and some chocolate frosting tube (from Walmart) found by all the birthday candles and sprinkles in the baking isle. First I melted the red chocolate, then dipped the oreo in it (I just covered the front side, I didn't completely cover the whole oreo. Then I put all the oreos in the fridge for a while for the chocolate to harden. Then I took out the chocolate frosting tube and made little heads. I put them back in the fridge for about 15 minutes for the little heads to harden, then I made a line down the middle (wings) and three dots on each side. Refrigerate until ready to eat. I decided not to do eyes. I thought they looked cute just how they were. Pretty easy and the kids loved them!

I am linked to THESE parties!

May 03, 2010

Scotch A Roos


These are an amazing spin on regular rice crispy treats. My Mom got them from someone at her work, and passed the recipe on to me. Try them, they are awesome!

1 cup corn syrup
1 cup sugar
Heat until bubbling. remove from heat and add 1 cup peanut butter and 6 cups rice crispies. Spread into 9x13 pan. Melt 1 cup of semi sweet chocolate chips and butterscotch chips. Spread over squares.

***I did not have butterscotch chips but DID have butterscotch ice cream topping, so I mixed in some of the topping in when I put the peanut butter in, and it was AWESOME. Then I just melted the semi sweet chocolate and drizzled it on top.

April 25, 2010

Princess Tiana's Famous Beignets


If you have seen The Princess and the Frog movie, I am sure you were craving Princess Tiana's famous beignets, (which is just a square french pastry). These are pretty easy to make and my daughter loved eating them with me while we watched the movie. I loved being able to say, "See what Tiana made, that's what we made," it was fun for us. Anyway, try these out, they are delicious.

3 cups flour
1/3 cup sugar
2 teaspoons baking powder
1/2 teaspoon baking soda
1/2 teaspoon salt
1/2 teaspoon nutmeg
1 cup buttermilk
1/3 cup water
1 egg, beaten
1/2 teaspoon vanilla extract
vegetable oil for frying
confectioner's sugar for dusting

In a bowl combine 2 3/4 cups of the flour, sugar, baking powder, baking soda, salt, and nutmeg. Whisk together.

In a different bowl, whisk the buttermilk, water, egg and vanilla and stir in the flour mixture.

Use the remaining flour to dust your work surface. Place the dough on it and pat it into a large 1/2 inch thick square. Dust the top with more flour (it is very sticky) and slice into squares.

Heat oil in a saucepan and carefully drop dough squares into the hot oil. Fry them for about 3 minutes then turn over. When done, dust with confectioners sugar.

*I found this recipe here, and Disney has given permission to share this recipe. To see more recipes from Tiana's Cookbook, check out the book here.

April 23, 2010

Angel Food Cake with Fruit


So we have all had the well-known strawberry shortcake, and if you love that, but are looking for a new spin on it, this is your recipe!
Ingredients:

One angel food cake (I just bought mine)
2 (12 oz.) packages of frozen mixed fruit (mine was strawberries, blueberries, blackberries, and raspberries)
water and sugar (to make a simple syrup)
whipping cream and powdered sugar (if you are going to make homemade whipped cream)

First, to make a simple syrup, boil one cup of water and add 1-2 cups of sugar, depending on how sweet you want it. Let it boil for a minute while continuing to stir, till the sugar is dissolved. Then turn off heat and let it cool. Put the frozen fruit (semi-thawed) into a bowl and when the simple syrup is cooled, pour it over the fruit and stir.

To make homemade whipped cream, just add whipping cream (I usually add about 1 cup) to your kitchen aid (hopefully you have one or this will be a sacrifice of the arm to make), and whip it for about 5 minutes or so until it is light and fluffy. Then add desired amount of powdered sugar (I like it sweet so I add about 2/3 cup). You can add almond or vanilla extract (about 1 teaspoon each) to add a little flavor zing to it.

April 22, 2010

Happy Earth Day!


Happy Earth Day everyone. I wanted to make a little treat for my husband to take to his scouts (he is a webelos leader) and since today is Earth Day, I thought this would be perfect. It was really quick and easy and the kids LOVED it. I am sure you have all had this before, or know the recipe, but just in case, or just as a reminder, here it is:

2 boxes of instant chocolate pudding
1 box of instant vanilla pudding
small clear plastic cups
oreo cookies
gummy worm/bugs/frogs (whatever you like)
whipped cream (optional)

Crush the oreo cookies (I used my magic bullet and made them really fine). Mix up the vanilla and chocolate puddings according to the package directions. Now you are supposed to mix them with whipped cream, but I forgot to get that at the store, so I just used the pudding as is, and it worked fine. Now this is how I did it, but you can creatively come up with whatever layering or what not you want. I put one spoonful of crushed oreos in the bottom of each cup, then one spoonful of vanilla, then a spoonful of oreos again, then a a couple spoonfuls of chocolate pudding (till it's almost full), then top it off with more crushed oreos and stick some gummy worms on top.

...and to really make them Earth Day appropriate, make little 'Happy Earth Day' flags with toothpicks.

April 01, 2010

Chocolate Nests

These easy no-bake sweets are the perfect addition to your Easter dessert menu, and kids LOVE helping you make them:

You'll need:
8 oz. semi-sweet chocolate
2 Tab. vegetable shortening
1 cup crisp rice cereal
1 cup chow mein noodles
mini candy coated chocolate eggs

Line baking sheets with waxed paper. In a large microwave-safe bowl, combine the chocolate and shortening. Microwave on medium stirring at 1 minute intervals until chocolate is melted and smooth (about 2 minutes). Gently stir in the rice cereal and chow mein noodles until throughly blended. Drop chocolate mixture by heaping tablespoonfuls 1 inch apart on prepared baking sheets. Using the back of a spoon, make an indentation in each spoonful of chocolate mixture to form a nest. Place chocolate nests on baking sheets in the fridge chill until set, about 1 hour. Remove nests from baking sheets. FIll each nest with candy as desired.

March 27, 2010

Chocolate Caramel Oat Bars


You'll Need:
1 1/2 cups flour
1/2 tsp. baking soda
1/4 tsp. salt
1 1/2 cups old-fashioned oats
1 1/2 cups packed brown sugar
1 cup + 2 Tab. butter, melted
1 (14 oz.) bag caramels
1/2 cup heavy cream
1 bag semi sweet chocolate chips

Unwrap caramels. Melt caramels with heavy cream in a saucepan over low - medium heat. In a large bowl, combine four, baking soda, salt, oats, brown sugar, and melted butter to form a crumbly mixture. Sprinkle half of the crumbly mixture into a greased 9x9 pan. Bake at 350 for 10-15 minutes. Sprinkle chocolate chips over baked mixture and top with caramel sauce. Sprinkle remaining crumbly mixture on top. Bake for 15 - 20 minutes more. Make at least several hours ahead to allow caramel to set.

*when I made these, I used a whole bag of chocolate chips and the chocolate kind of overpowered the caramel. Next time, I would use half to 3/4 of the bag.

March 18, 2010

Johnny Appleseed Day


It's Johnny Appleseed Day today, so I thought it would be perfect to post my Dutch Apple Cheesecake recipe. This is awesome! Here is the recipe:

(adapted from I-Love-Cheesecake)
The Crust:
20 Gingersnaps
2 Tablespoon very soft butter

Filling:
3 (8-ounce) packages of softend Cream Cheese
1 (14.5-ounce) can sweetened condensed milk
1 Tablespoon of Cornstarch
2 Teaspoon vanilla extract
1 Teaspoon cinnamon spice
3 large eggs, room temperature
1 can caramel apple pie filling

Crumb Topping:
3/4 cup packed brown sugar
3/4 cup all-purpose flour
1/3 cup butter, melted
1/2 teaspoon ground cinnamon
1/4 teaspoon ground nutmeg

Directions

Dutch Crumb Topping: Blend together brown sugar, flour, melted butter, ground cinnamon and ground nutmeg in a medium-sized bowl until mixture is crumbly. Set aside to use at end of baking cycle.

Crust: Preheat Oven at 350°F. Process gingersnaps and soft butter for crust in food processor until crumbs are nice and moist. Pat into a 9 inch springform pan. Bake in preheated 350°F oven for 8 - 10 minutes.

Filling: Preheat Oven at 350°F. Place a pan with about 2-inches of water in bottom of oven, to create moist atmosphere. If necessary refill with hot water every 30 minutes during baking. In large mixing bowl, slowly mix softened cream and sweetened condensed milk. Add in cornstrach, vanilla extract and cinnamon spice and blend well. When well blended, add 3 large eggs, one at a time and continue to mix. Mix in the whole can of caramel apple pie filling.

Bake for 35 minutes, pull from oven and sprinkle Dutch Crumb Topping on top and pat well. Return to oven for 20 minutes.

Remove cheesecake and run knife round edges of cake to loosen. Turn off oven heat and return cheesecake to oven and crack door and let set one hour, to slowly start cool down. (This cooling method will help you bake a crack free cheesecake. )

Remove and finish cooling on wire rack. Chill for 3 hours then remove sides of springform pan.

Drizzle with caramel sauce of your choosing (like caramel ice cream topping) or just top with Cool Whip. Serve and enjoy your Dutch Apple Cheesecake.

*My cheesecake took a little longer to bake, just keep checking it, make sure it is not jiggly.


Now while you are eating your Dutch Apple Cheesecake, take a minute to learn more about Johnny Appleseed HERE.

March 15, 2010

Pot of Gold


I got this idea from Love, Actually, and then I just went off from that. I found small clay pots at the dollar store in a pack of three; then painted them all black. Then I just got some pipe cleaner at Target ($2), and a bag of rolos. I twisted red, orange. yellow, green, and blue pipe-cleaners together at the ends, put them deep into the clay pots, and then filled with rolos.

I also thought these cupcakes were so cute, and I think I will attempt to make them tomorrow. Find the recipe at Family Fun:

February 14, 2010

Valentine's Heart Brownies

How cute are these, and so yummy! From Little Birdie Secrets, "I got the idea for these brownie bites from Betty Crocker. Make a pan (or two) of brownies (fudge style, not cake-like), let them cool, and cut them out with a heart cookie cutter. Then melt a scoop of chocolate frosting in the microwave for about 10 seconds (or less--don't let it boil). Spoon it over the hearts. I had mine laid out on wax paper to help with clean-up. Before the frosting sets, add sprinkles. For the pink drizzle, I mixed some red food coloring into some vanilla frosting and warmed it like the chocolate frosting, then drizzled it over with a spoon. Easy-peasy!"

January 25, 2010

Fruit Cobbler

1 can of pie filling (I usually use peach, but any will work)

1 cup frozen blueberries

1 cake mix (dry) (I usually use vanilla or yellow)

1 cup melted butter


In a 9x13 pan, layer ingredients in the order above. Bake 325 for 45 minutes. The original recipe calls for cherry pie filling with white cake mix. You can mix and match to make different creations.


Watermelon Cake


I thought this was a cute summery cake for fun, a party, whatever! It is super easy.
1 box cake mix (i used strawberry for the pink, but you can use vanilla with food coloring).
frosting (I used vanilla and colored half pink, half green
mini chocolate chips

Mix up the cake mix according to directions on the box. Stir in the mini chocolate chips. Bake in the two 9" circle pans also according to directions on box. Cool completely and frost top with pink frosting and sides with green frosting. Sprinkle some mini chocolate chips on top.

Cheesecake Cookies


I found this recipe at My Kitchen Cafe. They are very yummy. However, the original recipe calls for cherries, and I am not a huge cherry fan, so I also made some with hot fudge and caramel, and some strawberry ones. The strawberry ones were by far the most popular (just FYI). Anyway, you really could be creative and do whatever with these.

3 1/2 cups all-purpose flour
2 teaspoons baking powder
1 teaspoon salt
2 (8-ounce) packages cream cheese, softened
2 1/2 sticks butter, softened
1 1/2 cups sugar
2 large eggs
2 teaspoons vanilla extract
1 cup graham cracker crumbs

i can cherry pie filling
Hot fudge and Caramel
Strawberry jam and fresh sliced strawberries

Combine the flour, baking powder and salt in a bowl. In another bowl with an electric mixer, beat cream cheese, butter and sugar until smooth and creamy, about 2 minutes. Add eggs and vanilla and mix until incorporated. Reduce speed to low and add the flour mixture and mix until just combined. Refrigerate dough until firm, at least 30 minutes (very important, needs to be chilled in order to roll into balls; otherwise it's too sticky).

Preheat oven to 350 degrees. Line 2 baking sheets with parchment paper or silpat liners. Place graham cracker crumbs in a shallow dish ( I crushed the graham crackers in a food processor and I think they were too finely crushed. Then I tried putting the graham crackers in a ziplock bag and crushing them with a rolling pin and this worked really well.)

Roll the dough into 1 1/2-inch balls, then roll the balls in graham cracker crumbs. Place balls 2 inches apart on prepared baking sheets. Using a tablespoon measure, make an indentation in the center of each ball. Place 3 cherries in the dimple; or put a Tab. or so of hot fudge, or a Tab. or so of strawberry jam. Bake until golden brown around the edges, 12 to 14 minutes. Cool for five minutes on the sheet and then transfer to a wire rack to cool completely. After they are baked and cooled, top the hot fudge ones with a few lines of caramel, and the strawberry jam ones with a couple slices of fresh strawberries.


This recipe made about 4 dozen cookies.

January 23, 2010

Amazing Lemon Bars


I love lemon bars and my whole life I had stuck to one recipe in one of my mom's cookbooks; but one day I decided to venture out and see if I could find a recipe that would make even better lemon bars, amazing ones, the best; and I found one. It is Ina Garten's (Barefoot Contessa) recipe also found here, that I just changed a little, so good, so try this one out:

For the crust:

  • 1/2 pound unsalted butter, at room temperature
  • 1/2 cup granulated sugar
  • 2 cups flour
  • 1/8 teaspoon kosher salt

For the filling:

  • 6 extra-large eggs at room temperature
  • 2 1/3 cups granulated sugar
  • 2 tablespoons grated lemon zest (4 lemons about)
  • 1 cup freshly squeezed lemon juice (6 lemons)
  • 1 cup flour
  • I added a little orange zest and fresh squeezed orange juice from one of those cutie oranges
  • Confectioners' sugar, for dusting

Directions

Preheat the oven to 350 degrees F.

For the crust, cream the butter and sugar until light in the bowl of an electric mixer fitted with the paddle attachment. Combine the flour and salt and, with the mixer on low, add to the butter until just mixed. Dump the dough onto a well-floured board and gather into a ball. Flatten the dough with floured hands and press it into a 9 by 13 by 2-inch baking sheet. Chill for a half hour or so.

Bake the crust for 15 to 20 minutes, until very lightly browned.

For the filling, whisk together the eggs, sugar, lemon zest, lemon juice, and flour. Pour over the crust (I poured it over the crust while it was still hot) and bake for 30 to 35 minutes, until the filling is set.

*I think there is a huge taste difference if you chill these in the fridge for at least an hour once they are done. They taste better a little cold (to me anyway). The crust is so good, like a shortbread type cookie, and the filling is delicious. It's the perfect crust to filling ratio. The original recipe calls for 3 cups of sugar in the filling but many of the reviews said that was way too much. I have a huge sugar tooth, and thought that 2 1/3 was perfect.


I am linked up with:

giveaways


December 16, 2009

Pumpkin Roll Dessert


Got this recipe from Penzey's Spices. This is amazing and is easy. Don't let the 'roll' part scare you, it isn't bad at all. Here is the recipe:

3 large eggs
7 1/2 oz canned pumpkin (half of a 15 oz. can)
1 cup sugar
1 cup flour
1 tsp. baking soda
1 tsp. baking powder
1 tsp. cinnamon
*I add about 1 tsp. of pumpkin pie spice to mine, and about 1 1/2 tsp. cinnamon)

Filling:
8 oz. softened cream cheese
1 cup powdered sugar
1 tsp. pure vanilla extract
2 Tab. softened butter

Preheat oven to 375. Line a jelly roll pan with wax paper and spray with non-stick spray. In a mixing bowl, beat together the eggs and pumpkin. Gradually add the dry ingredients and mix well. Pour the batter in the pan and spread evenly using a flexible spatula. Bake at 375 for 12 minutes. Gently turn the cake over and ease out onto a clean dish towel (not a terry one, a plain cloth), or cheesecloth, discard the wax paper and carefully roll the cake from the short end. (I put another cloth on top of the cake and rolled it up with the cake sandwiched between the two clothes). Let cool for 15 -20 minutes. Don't leave too long rolled up or it is hard to unroll without cracking. While the cake is rolled between the towels, beat together all the filling ingredients. Unroll cake and spread the filling all the way to the edges. Re-roll and place on a serving platter. I put the filling on the cake while the cake was still warm and had no problems with the filling melting as long as I put it in the fridge right away. Sift powdered sugar on top right before serving.

December 11, 2009

Candy Cane Cookies

I love candy cane cookies. However, these are a little different. I used the Betty Crocker sugar cookie powdered mix and they were so good and stayed soft. I did NOT used the peppermint extract because I thought the crushed candy canes on top were good enough, but you could use it; just be careful how much.
  • 1 package powdered sugar cookie mix
  • 1/3 cup butter, softened
  • 1 large egg
  • 1-3 Tbsp. flour
  • 1/2-1 tsp. peppermint extract (optional)
  • 4-5 drops red food coloring
  • 4-5 crushed candy canes

  • Preheat oven to 375 degrees F. Dump cookie mix into a large mixing bowl. Add softened butter, egg and one tablespoon of flour. Using an electric mixer or your hands, mix until it forms a soft dough. Divide dough in half. Add peppermint extract to one half (if you want it). Knead it into the dough until well-incorporated. Add a tablespoon of flour if dough is too sticky. Add red food coloring to the other half. Start with a few drops of food coloring, and add more until you get a deep pink color (or a red color, if you prefer). Add a tablespoon or two of additional flour if the dough is too sticky. Pinch off one teaspoon of pink dough. Roll between your palms to form a rope, about 3 to 4 inches long. Repeat with one teaspoon of the white dough. Place the ropes side-by-side and twist into a candy cane shape, pinching at the ends to seal. Place on an ungreased cookie sheet. Repeat with remaining dough. Bake 7 minutes until cookies are lightly browned around the edges. When they are in the oven, they don't look quite done, but be careful to not overbake. 7 minutes was just right for me. Immediately after taking out of oven, sprinkle with crushed candy cane and let cool.

LinkWithin

Related Posts with Thumbnails